
 Keep Dry


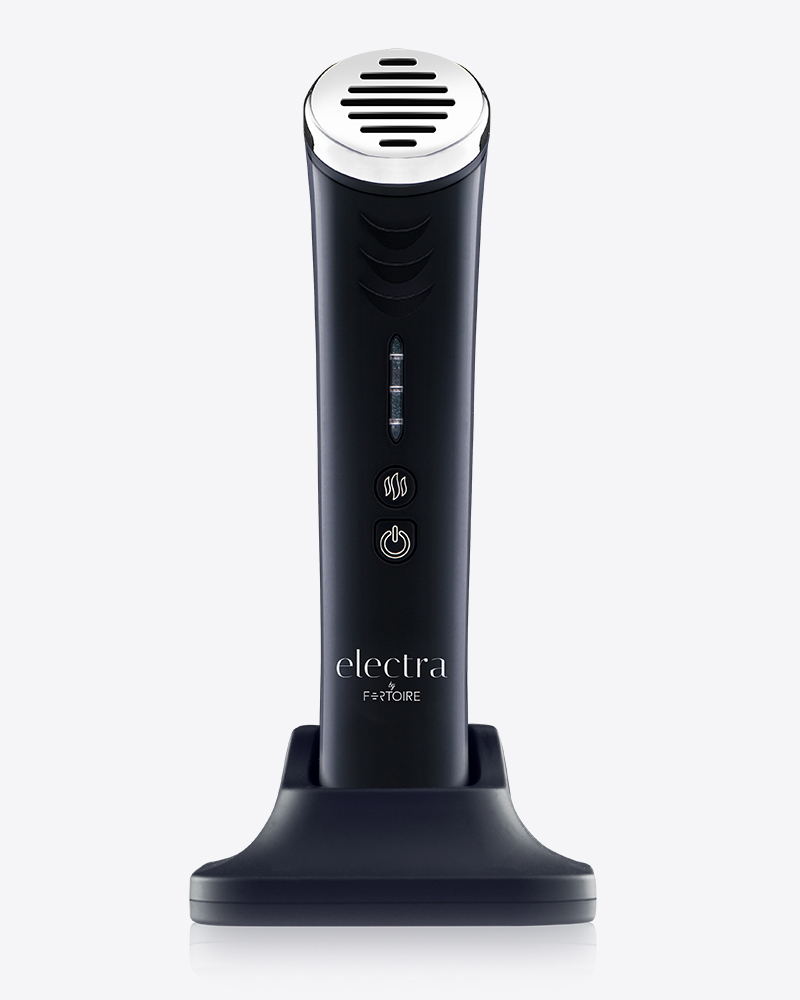
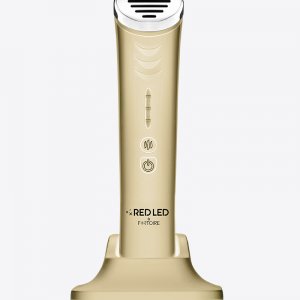
Electra Overview
The device’s stainless steel plate is durable, lightweight, and hypoallergenic.
The devices’ sleek product design is ergonomic and easy to grip.
The device comes with a convenient charging cradle and adapter.
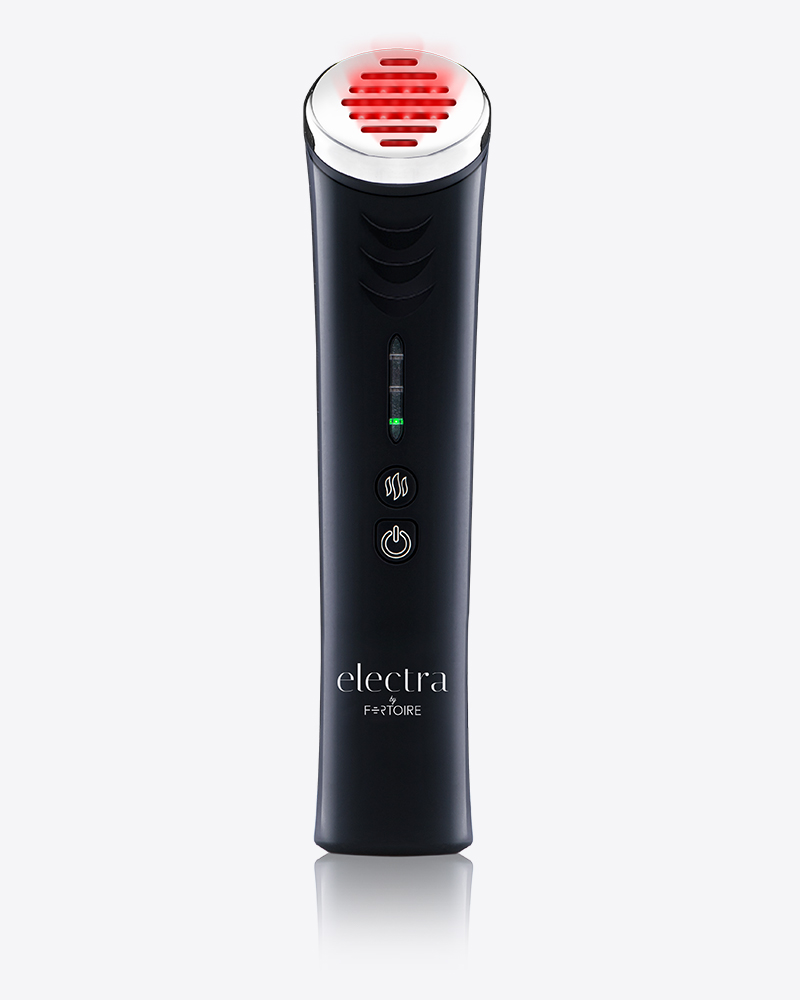
Light Indicators
The Electra is equipped with light indicators to signal when the device is powered on, in heat mode, charging or in need of charging. The light will either shine consistently or flash and light color will be green, green and yellow or red depending on what is being indicated. Each insistence is shown below:

Green:
Device is powered
ON.

Green + Yellow:
Heat is ON.

Flashing Red:
Device is in charging
port.

Steady Red:
Device is fully
charged

Rapid Flashing:
Device needs to be
charged
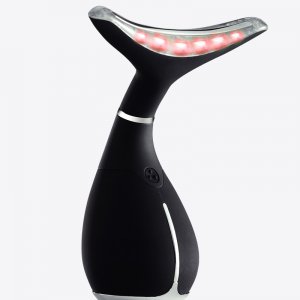
Treatment Areas
When using the Electra, it is recommended to treat the face one area at a time for approximately 5-7 minutes. Below we indicate suggested treatments areas: cheeks, forehead and undereye area. Do NOT use the device on eyelids. Be sure not to exceed the recommended treatment time per area as overexposure can lead to redness and swelling.
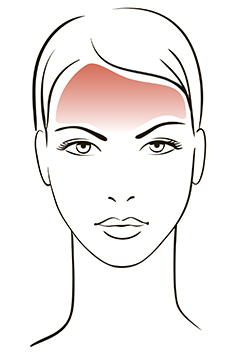
Forehead
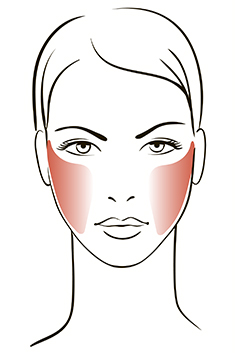
Cheeks
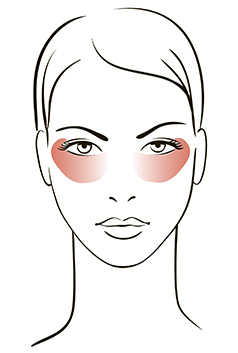
Eyes
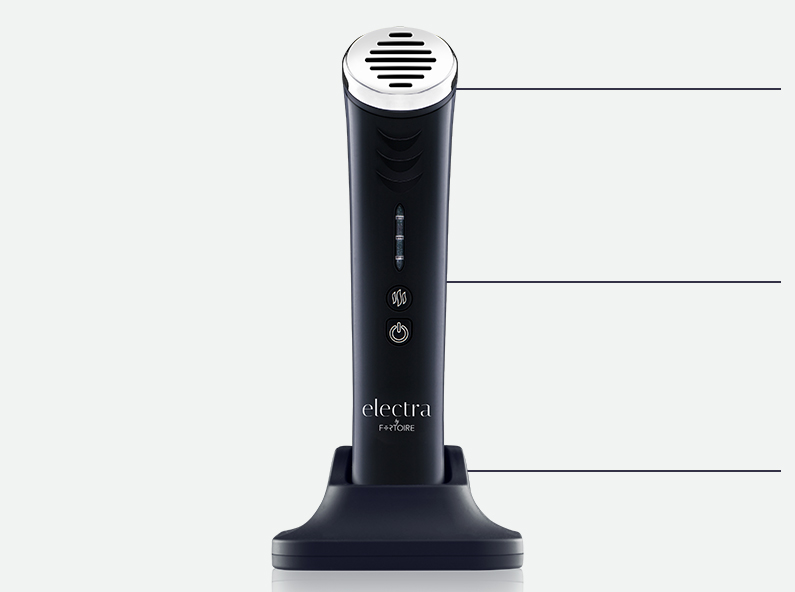
Features of the Electra

Auto Sensor
Simply turn on and begin your treatment with our sensory operated device.

Heat Therapy
Prepares your pores to begin your daily skin care routine.

Ergonomic
Soft touch handle makes it easy to use and optimal for comfort during treatment.
How to Use
Once fully charged, power on the Electra and apply it directly to dry cleansed skin. Gently massage in small, circular motions while applying light pressure for 3-5 minutes.
Step 1: Begin with a clean and dry face. Your skin should be free of any powder, gel or cream before beginning this LED treatment.
Step 2: Lift the device from the charging port. Press the Power ON/OFF button. The green indicator light will shine steady. Your Electra device is now ON and ready to use.
Step 3: To intensify results, press the HEAT button. The green and yellow indicator lights will shine steady. Please allow up to 4 minutes for device to reach maximum temperature (up to approximately 105°F).
Step 4: Place the treatment surface on the first area that you want to treat. Apply a light pressure while slowly moving the applicator in small circular motions.
Step 5: When treatment of all target areas is complete, turn the applicator off by pushing the ON/OFF button. The green or green + yellow indicator lights will turn off.
Step 6: Always apply a small amount of a moisturizing cream on the treated skin areas after each session, massaging in circular motions.
Step 7: Clean your device after each use and return it to the charging cradle. Please refer to cleaning and storage instructions on the Electra product manual.
I love it very much, thanks for recommendations!
I just bought the device and I love it !
It was the best investment and gift I have ever made for my wife . Shes happy and I’m saving money . On top all that the device have results that surprised us a lot . Thank you and I recommend this to all
Super impressed with the results. Its very important to take before and after pictures. I didnt think it was working at first but after comparing images from before I started using it, I can definitely see the change in my skin
Started using this after I saw my sisters results using this product. At first I thought she was a sucker for buying into this “fad” but to be honest, her skin is looking AMAZING! Who’s the real sucker now? I can’t wait to see my own results.